
Using Developer Portal
Paylocity's developer portal is your go-to hub for building, testing, and managing integrations that use Paylocity’s APIs.
PrerequisitesAccess to the developer portal experience is restricted to organizations with Technology Partnership or client custom-integration agreements. Developer Portal may not be available for all integration use-cases.
Create an Account & Log In
Start by signing up or logging in. A professional email address must be used to sign up for an account. Two-factor authentication will be required for account setup and login.
Once in, you’ll land on your Dashboard, where you can create and manage your integration(s).
Register an Integration
Create a new App (sometimes called an integration app) by entering a name and description. You’ll receive sandbox credentials (e.g., API client ID and secret) that let you test against a non-production environment.
The Clients card on your integration app details page will provide you with the companyID (a common required path parameter for Paylocity APIs) to which your credentials have been granted access for the specified environment.
Explore the API Docs
Use the API documentation to learn how to make requests, understand authentication, and handle responses.
The following resources are available as guidance on what APIs to use for common integration scenarios:
- Recipes for step-by-step code implementation instructions
- Our guide on common partner integration use cases
- Summary & use case examples presented in each endpoint specification
Start Testing
Use your sandbox credentials and create a private Postman workspace forked from our public repository to make test calls and refine your integration until it behaves as expected.
Manage Your App
You can:
- Rotate or expire sandbox credentials
- Identify what companies your credentials may access for each environment
- Select which APIs you app has access to in sandbox and view the APIs your app has access to in production once live
- Stage and request updates to metadata related to your integration app Marketplace listing
- Invite others to collaborate or co-manage your app
- Configure Developer Portal app notifications & alerts
Launch Your Integration
Once tested, you may request production credentials and move your app to a live status. This will involve:
- A review process; see Integration Requirements and Technology Partner Requirements
- Security/compliance checks be completed
Requesting launch of your app
-
From the integration app page click on Manage App > Verify Listing
This verification process will provide guidance if any required data to complete a review is missing.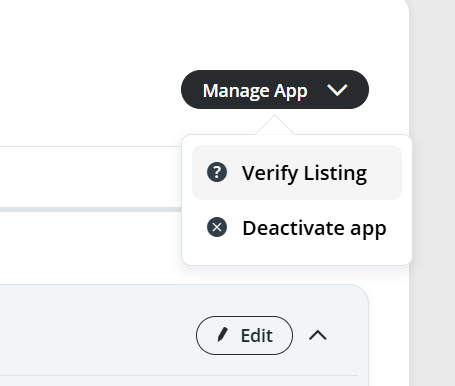
-
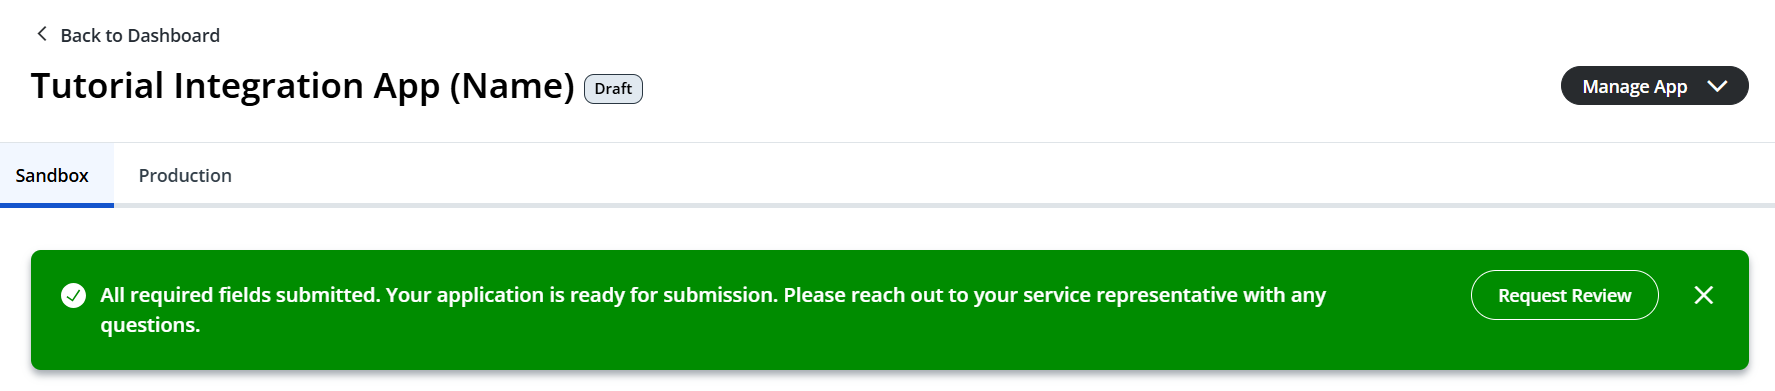
Once the verification is successful, a green banner will be presented with a button to initiate a Launch review request. Important: Once a launch review is started, you will be unable to update your application details and listing until the review is completed. Make sure all provided information is correct.
-
During the review process your application status will show as "Under Review" and any updates to this status, such as needing more information or being approved for go-live will be sent via email notifications.
-
Once approved and marked as "Live" you will be able access the "Production" tab in Developer Portal, where you may provision your API credentials. The Production tab displays your current Production configuration and authorized companyIDs. Updates made in Sandbox do not apply to Production without Paylocity review and approval.
Best Security Practices
- Keep your sandbox and production environments separate and rotate credentials regularly for security
- Never hardcode credentials in code. Store them in environment variables or a secure secrets manager
- Use secret manager tools for storage and access to credentials such as AWS Secrets Manager, Azure Key Vault, GCP Secret Manager, and Postman workspace vault
- Avoid saving secrets on developer machines or config files unless absolutely necessary, and always encrypt them
Managing Access to Your App
To support collaboration while maintaining control, the developer portal provides two roles: Owners and Collaborators. Each role grants a different level of access and responsibility and is controlled at the app level; this enables you to set different permissions when multiple teams or organizations are working on different apps.
Owners
Owners have full administrative control over the app. This role is intended for users responsible for the overall lifecycle and governance of the application.
Owners can:
- Request a launch review
- Deactivate or otherwise change the app’s status
- Add or remove other owners
- Invite and manage collaborators
- Manage all app configuration and settings
Because Owners can perform actions that directly affect the app’s availability and lifecycle, this role should be assigned carefully. It's recommended to have at least two users (a primary and backup) to manage each integration application.
Collaborators
Collaborators have limited, configurable access to the app. Permissions are defined at the time of invitation, allowing you to tailor access based on the user’s responsibilities.
Depending on the permissions granted, collaborators can:
- View or edit specific sections of the application
- Access particular types of app information
- Work within sandbox environment settings only
- Invite and manage other collaborators, if granted that permission
Unlike Owners, Collaborators cannot request launch reviews, deactivate the app or change its status, or Add/remove/manage owners. Even with the highest level of collaborator permissions, actions that impact the app’s lifecycle or ownership remain restricted to the Owner role.
Inviting & Managing Owners/Collaborators
Restrictions still apply to who can be invitedOnly individuals from pre-approved organizations/email domains or users with active developer portal accounts will be able to be invited to collaborate on an app.
- Log into Developer Portal
- Click on the app to which you want to invite the person
- Click on the "App Settings" button
- Choose to invite an Owner or a collaborator
- Enter the person's email address. Separate multiple email addresses with a space. Multiple people receiving the same access and role can be invited at once.
- When inviting collaborators, you must specify the permissions per environment and what data the individual may view or edit. You may use the Template selector to prepopulate permissions based on common roles and customize further as needed.
- After creating an invite, it will show in the "Pending Invites" tab until the user accepts or rejects the invite. Invites are valid for 7 days from the date the invite was sent. You may resend an invite by clicking the "resend invite" button, but an invite cannot be sent to an individual more than once every 5 minutes.
- Collaborators and owners may be edited/removed from the app by clicking the ... and choosing the respective action.
Updated 3 months ago